In many Canadian homes — especially condos, basements, or small living rooms — the most logical spot for a TV is often the least convenient: the corner.
A full-motion wall mount turns that corner into usable space, letting you pull the screen forward, swivel it toward seating, or fold it flat when not in use.
This 2025 guide explains:
- How to measure your corner and find safe stud positions
- What tools and checks you’ll need before drilling
- Step-by-step mounting and alignment
- Corner-friendly wall mounts that balance reach, tilt, and space-saving design
Skill level: Beginner–Intermediate
Time required: 45–90 minutes
Wall type: Wood studs or concrete (not drywall alone)
Step 1 – Measure Your Corner and Check Wall Structure
Before ordering a mount, confirm that your corner can physically accommodate the bracket and the full TV width.
- Measure corner angle – usually around 90°, but older homes may vary a few degrees.
- Find studs on both walls using a stud finder; mark their centres.
- Check available wall space – at least 16–24 inches each side from the corner is ideal.
- Visualize screen fit – hold a tape diagonally to confirm the corners of the TV won’t touch the wall when angled.
| Measurement | Typical value | Why it matters |
|---|---|---|
| Corner angle | 90° | Affects swivel range |
| Stud spacing | 16 in on centre | Ensures wall plate reaches two studs |
| TV size range | 23″–60″ | Fits both compact and mid-size mounts |
| Arm extension | 14–16 in | Needed to pull TV clear of corner walls |
Tip: If your walls use metal studs or unknown framing, confirm anchor compatibility before drilling.
Step 2 – Choose the Right Full-Motion Mount for Your Space
Corner installations rely on mounts that extend and pivot freely.
Below are two options covering most small-to-medium setups.

| Example Mount | Recommended Screen Size | Load Capacity | Tilt / Swivel / Extension | Supported VESA (mm) |
|---|---|---|---|---|
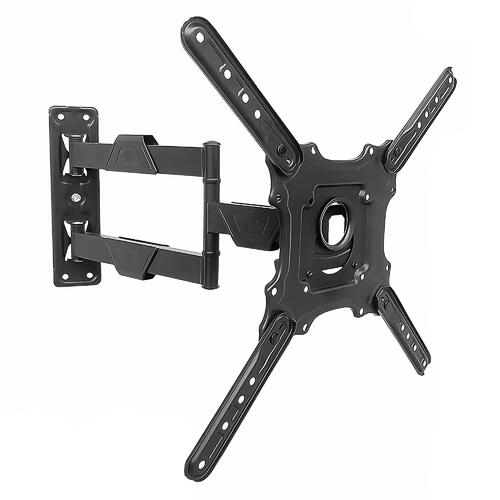
| Full Motion TV Wall Mount for 23″–43″ | 23″–43″ | 30 kg / 66 lb | +3°/-10° tilt, 180° swivel, 14.9″ extension / 2.2″ retract | 100×100 – 200×200 |
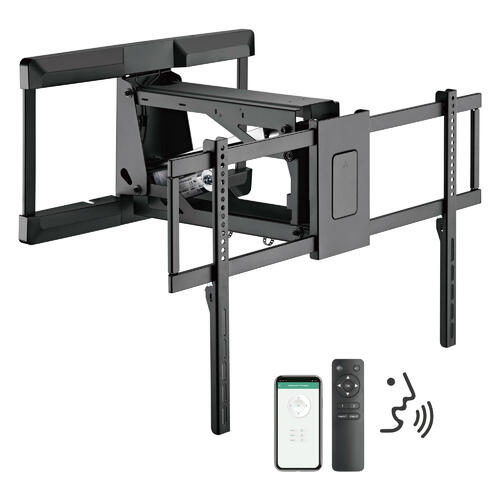
| Full Motion TV Wall Mount for 26″–60″ | 26″–60″ | 36 kg / 80 lb | +8°/-5° tilt, ±90° swivel, 15.7″ extension | 100×100 – 400×400 |
Both are built from heavy-duty steel, suitable for corner placement, and allow fine adjustments after installation.
For most apartments, the smaller model covers bedroom and office TVs, while the 26″–60″ version fits main living areas or multi-angle setups.
Step 3 – Gather Tools and Hardware
You’ll need:
- Stud finder
- Measuring tape
- Level (torpedo or laser)
- Power drill + bits
- Socket wrench
- Screwdrivers
- Pencil / masking tape
Tip: Keep a soft blanket or cardboard on the floor to rest the TV screen while attaching brackets.

Quick Installation Overview
Step 4 – Mark and Drill Mounting Holes
- Determine height: centre of screen around 42–48 in from floor for seated viewing.
- Use level to mark a horizontal guide.
- Align wall plate with stud marks.
- Drill pilot holes ≈ 2.5 in deep into studs.
- Insert lag bolts and tighten firmly.
Always ensure bolts go into solid wood or masonry — never drywall alone.
Step 5 – Attach Mounting Brackets to the TV
- Lay TV face-down on a soft surface.
- Identify VESA pattern (e.g., 200×200 or 400×400 mm).
- Select correct screws + spacers from the kit.
- Tighten evenly without overtightening.
| TV size | Common VESA | Screw type |
|---|---|---|
| 23–43″ | 200×200 mm | M6 |
| 50–60″ | 400×400 mm | M8 |
Both featured mounts support these standards, making them compatible with most Canadian-market TVs.
Step 6 – Mount the TV and Adjust Viewing Angle
- With help, lift TV and hook brackets onto wall plate.
- Lock safety clips or screws.
- Extend the arms, then centre the screen diagonally between walls.
- Adjust tilt (up/down) and swivel (left/right) for the best sightline.
- Check cable slack when moving the arms through full range.
A compact bracket like the 23″–43″ Full Motion Mount fits neatly in tighter corners, while the 26″–60″ model offers extra reach and swivel for larger viewing zones.
Step 7 – Cable Management & Safety Check
- Route power + HDMI cables along the arms using built-in channels or Velcro ties.
- Avoid sharp bends or stretched cords.
- Plug into a surge protector to protect against voltage spikes.
- After 24–48 hours, re-tighten all bolts and recheck level.
TL;DR – Quick Corner-Mount Checklist
- Measure corner & find studs.
- Choose a full-motion mount matching your TV size (23–60″).
- Drill into studs and secure wall plate.
- Attach TV brackets → hang → lock.
- Adjust tilt / swivel / rotation.
- Manage cables and confirm stability.
FAQ – Corner TV Mounting in Small Spaces (Canada 2025)
1. Can I mount directly into drywall?
No. Always secure into wood studs or solid concrete. Drywall anchors alone are unsafe for full-motion arms.
2. What is the correct height?
Aim for screen centre ≈ 42–48 in from floor, adjusting tilt 10–15° downward if mounted higher.
3. How do I prevent cable strain?
Leave extra slack and check cable movement across the mount’s full extension range.


