If you’ve ever built a standing desk setup and then watched everything tug, flicker, or sag the moment you raise the desk, you already know: the hard part isn’t the desk. It’s the power, cables, and mounts that have to move smoothly together. This guide walks you through a clean, safe, standards-aware build—plus a checklist of items most people forget.
Why most standing-desk builds fail

Three culprits cause 80% of issues:
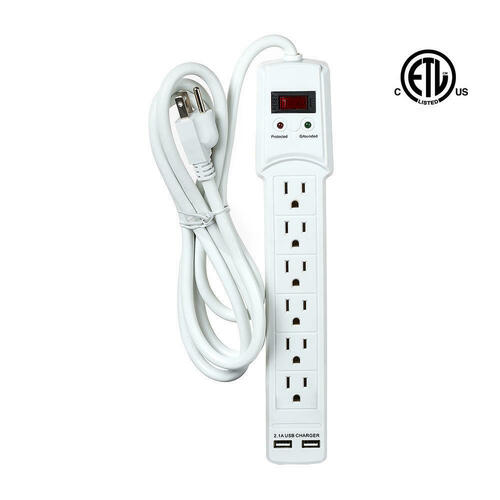
- Under-spec power — A “random power strip” can lack proper surge protection or the right form factor for a moving desk. Look for devices verified to relevant safety standards (see UL notes below). UL
- Incompatible monitor arms — Arms are limited by VESA pattern, weight rating, and desk clamp thickness. If any one is wrong, expect droop or a wobbly desk. VESA
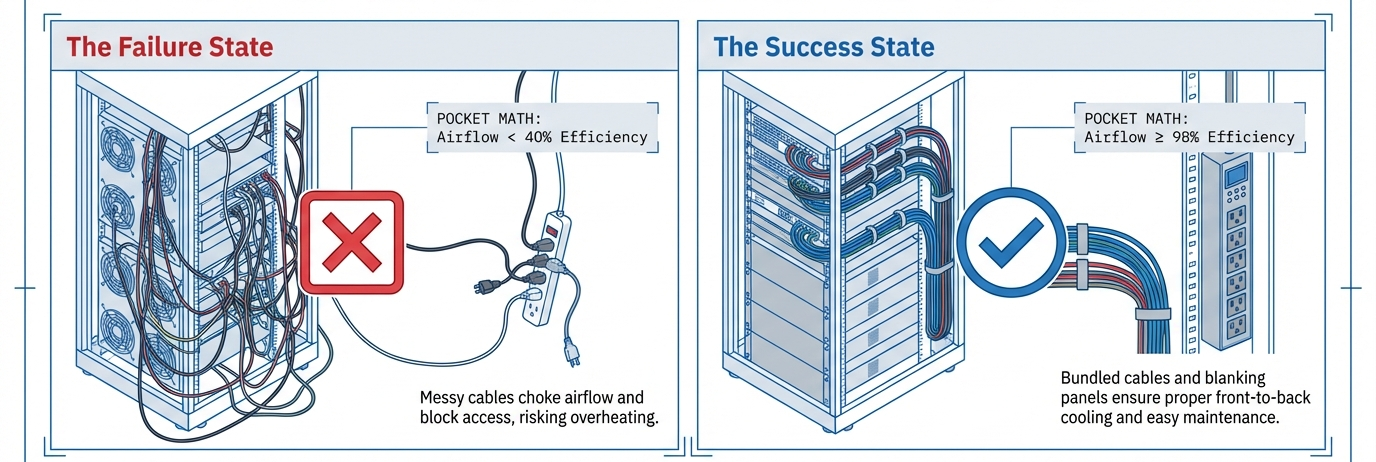
- Cables that can’t travel — The desk moves ~40–50 cm between sitting and standing. If your cable bundle doesn’t have a controlled slack loop (or a cable chain), connectors get stressed and ports loosen, which can cause intermittent video/USB drop-outs.
Pre-flight checklist
- Measure your desk: thickness (for clamp range), and grommet hole diameter (commonly 60–80 mm).
- List your devices & watts: laptop, monitors, speakers, charger, lamp.
- Inventory ports: Are you using DisplayPort, HDMI, or USB-C video? Need Ethernet?
- Check VESA & weight: Find the VESA pattern (e.g., 75×75, 100×100) and weigh the monitor (include the stand if your arm replaces it).
- Plan cable travel: Decide where the slack loop will live (behind the monitor or under the desktop) and whether you need a cable chain.
Power you actually need and safe distribution

Surge protector vs UPS. A surge protector clamps high-energy spikes; a UPS adds battery backup for brief outages and safe shutdown. When placing power on a standing desk, keep cord strain minimal and route the main AC lead along a leg to reduce movement at the wall outlet.
Look for standards:
- Relocatable Power Taps (power strips) are investigated to UL 1363 in the U.S.; the Canadian counterpart is CSA-C22.2 No. 308. (Source: UL Relocatable Power Taps overview, Accessed: 2026-02).
- Surge Protective Devices are evaluated under UL 1449; industry associations maintain accessible summaries. (Source: NEMA Surge: UL 1449 overview, Accessed: 2026-02).
USB-C power (PD). If you want single-cable laptop docking, your charger and cable must match your laptop’s actual draw: 60W, 100W, 140W+, or up to 240W with PD 3.1. The USB Implementers Forum specifies PD 3.1 at up to 48V/5A (240W) and introduced clear 60W/240W cable power logos to reduce confusion. (Source: USB-IF PD page & PD 3.1 announcement, Updated: 2021-05/09).
Tip: if your laptop peaks at 140W–180W, a 60W cable won’t cut it; look explicitly for the 240W cable mark.
Desk-friendly power hardware.
- Clamp or grommet power hubs keep plugs reachable and off the floor.
- Under-desk trays carry a surge protector and coiled slack.
- Adhesive raceways guide the AC lead down the rear leg to a fixed outlet.
- Cable chain (a flexible plastic spine) tames the vertical travel from sit to stand.
Monitor arms & VESA compatibility
Know your VESA pattern. VESA’s FDMI defines standardized mounting hole patterns (e.g., 75×75 mm, 100×100 mm, larger MIS-E/MIS-F sizes for heavier displays). (Source: VESA FDMI overview, Accessed: 2026-02).
Weight rating matters. Add the weight of adapters, light bars, and cables—not just the panel. Monitor arms are rated for a range (e.g., 2–9 kg). If you’re near the top end, expect reduced adjustability.
Clamp vs grommet vs through-bolt.
- Clamp: Fast and desk-friendly; check the maximum desk thickness and consider a reinforcement plate on soft desktops.
- Grommet: Uses the desk’s cable hole for a cleaner center mount.
- Through-bolt: Most rigid; requires drilling.

Ergonomics you can defend. The top of the monitor at or slightly below eye level, screens roughly at arm’s length, and elbows 90–120° are consistent recommendations in authoritative ergonomics resources. (Sources: OSHA eTool: Monitors & Positions, Accessed: 2026-02; CCOHS monitor guidance, Accessed: 2026-02).
Organizations like OSHA and CCOHS emphasize neutral neck posture and appropriate viewing distance; follow those before you chase aesthetics.
Cables that move and don’t break
Video paths.
- DisplayPort is reliable for higher resolutions/refresh rates and long runs within a desk.
- HDMI is fine for many monitors but can be more finicky at high bandwidths over long cables.
- USB-C Alt Mode can carry DisplayPort video; whether you can drive two monitors depends on the laptop GPU, dock, and USB/Thunderbolt version—not just the cable.
Data paths.
- USB-A/USB-C for peripherals; consider a desktop hub mounted under the desk’s front edge so short cables don’t tug when the desk moves.
- Ethernet: run one long cable with a small adhesive strain-relief at the desk leg.
Charging paths.
- For single-cable setups, use a PD-rated USB-C cable with the proper 60W or 240W logo. (Source: USB-IF cable power rating logos, Updated: 2021-09).
- For multi-cable setups, mount the AC charger on the under-desk tray and use a short, high-current USB-C from tray to laptop to minimize tug.
Make it move safely.
- Add a 30–40 cm slack loop where the bundle turns upward to the monitors.
- Use right-angle adapters (USB-C, DisplayPort, HDMI) to reduce lever stress.
- Bundle with Velcro ties and add labels at both ends so troubleshooting is easy.
Accessories people forget to buy
- Under-desk cable tray and a cable chain to manage vertical travel.
- VESA adapter plate/spacers for oddball monitors; keep extra M4/M6 screws & washers.
- Clamp-on power hub at desktop level for peripherals you unplug often.
- Surge protector (UL 1449) or a small line-interactive UPS for your computer gear. (Source: NEMA overview of UL 1449, Accessed: 2026-02).
- Right-angle adapters (USB-C/DP/HDMI) to reduce cable protrusion at the back of monitors.
- Velcro ties, ID labels, and a rubber grommet for sharp cable passthroughs.
- Anti-fatigue mat and a footrest for posture variety; these support the ergonomics targets recommended by authorities like OSHA. (Source: OSHA eTool – Positions, Accessed: 2026-02).
- Webcam/light bar/mic boom mounts that clamp to a monitor arm pole.
- KVM or USB switch if you routinely swap between a laptop and a desktop.
- Ethernet extension if Wi-Fi is unreliable.
- Desk reinforcement plate for thin desktops with heavy arms.
Example layouts

A) Single-cable laptop workflow (USB-C/USB4 dock)
- Power: USB-C PD charger matched to your laptop’s max draw (e.g., 100W, 140W, 180W, or 240W). Confirm the PD logo on the cable. (Source: USB-IF PD 3.1 & cable rating logos, Updated: 2021-05/09).
- Video: Dock → DisplayPort to each monitor for reliability.
- Data: Short USB runs from an under-desk hub to keyboard/mouse/audio.
- Routing: AC outlet → surge protector in tray; one vertical cable chain to the desktop; one slack loop behind the primary monitor.
B) Multi-cable (charger + direct display)
- Power: OEM charger under-mounted.
- Video: Laptop → DisplayPort/HDMI directly to monitors (bypass dock).
- Data: Small 4–7-port USB-C hub near the front edge underside.
- Routing: Two slack loops: one for the laptop bundle, one for the monitor harness.
Fine-tuning ergonomics (sit and stand)

Ergonomic guidance from authorities agrees on the big three: eye height, elbow angle, and viewing distance.
- Eye height: The top of the monitor should be at or slightly below eye level; the center is usually 15–20° below horizontal eye level. (Source: OSHA eTool – Monitors, Accessed: 2026-02).
- Viewing distance: About arm’s length, adjusted for your screen size and vision. (Source: NIH/ORS and CCOHS guidance, Accessed: 2026-02).
- Elbows: Keep elbows 90–120°, shoulders relaxed, and wrists straight. (Source: OSHA eTool – Positions, Accessed: 2026-02).
If your desktop height can’t hit these targets simultaneously, add a keyboard tray so the monitors can sit where your eyes want them while your wrists stay neutral. Guidance from ergonomics programs (e.g., NIH Office of Research Services) supports self-assessments when you change furniture or monitor size. (Source: NIH Ergonomics Program, Accessed: 2026-02).
Monitor-Arm & VESA Fit Quick-Check
| Field | What to verify | Why it matters |
|---|---|---|
| VESA pattern | 75×75, 100×100, larger MIS-E/MIS-F patterns per FDMI | Ensures your arm/adapter physically matches your display. (Source: VESA FDMI overview, Accessed: 2026-02). |
| Screw size | M4 (common for 75/100 mm), larger for MIS-E/F | Wrong screws strip threads or won’t seat; keep spare M4/M6 with washers. |
| Display weight | Panel + cables + lightbar/webcam | Arms are torque-limited; near-limit loads sag. |
| Clamp range | Min–max desk thickness | Prevents clamp bite and wobble; add a reinforcement plate if needed. |
| Mount type | Clamp, grommet, through-bolt | Pick for rigidity and desk compatibility. |
| Arm capacity | Min–max (e.g., 2–9 kg) | Ensures smooth adjustability (gas spring balance). |
Power & Cable Planning Worksheet
| Device | Est. Watts | Video Path | Data Path | Cable Spec to Match | Notes |
|---|---|---|---|---|---|
| Laptop (creator class) | 140–180 | USB-C Alt Mode → DP | USB-C to dock | PD 140–240W, 240W cable logo | Single-cable requires PD headroom. (Source: USB-IF PD 3.1, Updated: 2021-05). |
| Monitor A (27″) | 25–40 | DP 1.4 | USB-B/-C hub → PC | DP-certified cable | Keep one slack loop at the arm. |
| Monitor B (27″) | 25–40 | DP 1.4 | — | DP-certified cable | Use right-angle DP if ports face wall. |
| Speakers/Interface | 10–20 | — | USB-A/-C | Short USB to under-desk hub | Mount hub close to front edge. |
| Lamp/Light Bar | 5–10 | — | — | — | Avoid glare; keep clear of cameras. |
| Router/Ethernet | — | — | Cat6 to wall | Cat6, adhesive strain relief | Fix the vertical run on desk leg. |
| Totals | ~200–300W | — | — | — | Select a UL-listed surge protector or UPS sized above peak. (Source: NEMA on UL 1449, Accessed: 2026-02). |
Troubleshooting the classics
Video flicker or blackouts when raising the desk
- Likely a tensioned cable at max travel. Add a bigger slack loop or move the loop pivot.
- If you’re using USB-C Alt Mode with a dock, test a direct DisplayPort cable to isolate the dock.
USB devices disconnect
- Check if the laptop is power-throttling the dock (insufficient PD wattage). Use a charger/cable with the correct PD rating. (Source: USB-IF PD & cable logos, Updated: 2021-09).
Arm droop
- You’re at or above the arm’s rated capacity. Reduce load (remove lightbar/webcam), increase spring tension, or choose a higher-capacity arm.
Wobble
- Clamp mismatch to desk thickness or a soft desktop. Add a reinforcement plate or move to a grommet/through-bolt mount.
Evidence & standards you can cite at work
- USB-C Power Delivery 3.1 enables up to 240W, with standardized 60W/240W cable markings to indicate capability. (Source: USB-IF official pages & announcements, Updated: 2021-05/09).
- VESA FDMI defines the mounting hole patterns and sizes found on displays; check pattern and weight before buying an arm. (Source: VESA FDMI overview, Accessed: 2026-02).
- Ergonomic targets (eye height, elbow angle, viewing distance) are documented by authorities (OSHA/CCOHS) and can guide sit/stand positions. (Sources: OSHA eTool; CCOHS monitor positioning; Accessed: 2026-02).
For deeper reading, the U.S. National Institute of Standards and Technology maintains accessible guides on surge protection fundamentals. (Source: NIST “Surges Happen!” and related guides, Accessed: 2026-02).
(That’s handy when proposing a UPS/surge plan to IT.) NIST
FAQs
Can one USB-C cable run everything on a standing desk?
Sometimes. If your laptop, charger, dock, and cable all support enough PD wattage (e.g., 100W–240W) and your dock/GPU can drive your monitors, a single USB-C can carry power + video + data. Watch for PD 3.1 and the 240W cable logo for high-draw laptops. (Source: USB-IF PD/cable logo guidance, Updated: 2021-09).
How high should my monitors be when sitting vs standing?
Keep the top edge at or slightly below eye level; the center typically sits 15–20° below your horizontal sightline, with screens about an arm’s length away. Apply the same rule in sitting and standing—just raise/lower the arm and desk together. (Sources: OSHA eTool; CCOHS; NIH/ORS self-assessment; Accessed: 2026-02).
Do I need a UPS or just a surge protector?
For power blips and safe shutdown, get a UPS. For spike suppression only, a surge protector (evaluated to UL 1449) is the baseline. If you’re in a surge-prone area or working on critical files, a small line-interactive UPS is cheap insurance. (Source: NEMA on UL 1449; NIST consumer surge guides, Accessed: 2026-02).
Why do my USB-C docks drop video when I raise the desk?
Cables are hitting their bend/tension limit at full height, or your setup is under-powered (PD mismatch). Add a longer cable or reroute slack; verify the PD wattage of charger + cable. (Source: USB-IF PD & cable logo guidance, Updated: 2021-09).
What VESA details matter besides the hole pattern?
Check screw size (often M4 for 75/100 mm patterns) and maximum display weight the arm supports. The FDMI standard covers interfaces across display sizes; always verify both pattern and weight. (Source: VESA FDMI overview, Accessed: 2026-02).
